Alright, I'm going to continue this post assuming you've read Part 1.
Let's pick out the perfect false lashes first. There's various false lashes- crazy, over top ones with feathers, crystals and colored hairs (like those sold by Shu Uemura's Tokyo Lash Bar and even NYX has theatrical lashes) but there's natural looking lashes out there as well.
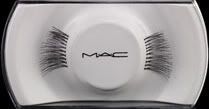 I'm going to sidetrack for a moment, and talk about price. If you're messing around with false lashes for the first time, start with cheap lashes from the drugstore. There's no point in wrecking a pair of $13 ones from MAC when you're just playing around with them. Actually, I'm not a big fan of spending lots of money on falsies- perhaps for my wedding I'll invest in a $29 pair of Shu lashes but I don't really see the point in splurging a large amount for something that is ultimately quite disposable. Yes, expensive lashes can (and should) be reused, you want to get your money's worth- but drugstore brands like Andrea, Kiss, Ardell and Revlon do just as well for certain styles of lashes, and they're really cheap, generally under $5.
  Ebay is another option too- there are very cheap lashes in bulk online. However, a lot of the lashes sold overseas in Asia are synthetic ones (all the ones you can buy from drugstores in the US are generally genuine human hair) and those can be harder to work with. Synthetic lashes are quite durable, but it's hard to adapt them to your eye shape because they like to keep their original shape which is why I prefer genuine hair lashes.
 What to look for when searching for natural lashes:
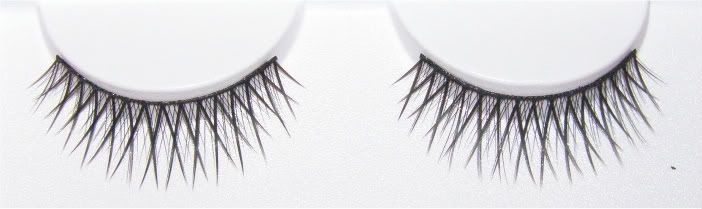
-Invisible or thin bands. Ardell makes a whole line, InvisiBand that features clear bands. The less visible the band is, the easier it is to cover up and the more subtle the effect is. This is why I don't like NYX lashes so much- their bands are bulky and very dark and thick which makes them harder to work with.
-Length of strip. Not all bands are equally long. I generally see three kinds of strip lengths- full strip, half strip and ones that are in between, something like a 2/3 strip. If you buy full strip lashes, there is a good chance that you will have to trim them down to keep the ends from poking your eye because it's longer than your eye shape allows.
-Actual lashes; spacing, length & placement. Some false lashes have a cross pattern, while other lashes have separate clusters and some consist of evenly spaced hairs. Cross patterns provide a bit more 'oomph' than the other two. In any case, the most natural looking lashes will be just a bit longer than your own.
Holy cow, I'm getting rather verbose. Ok, actual lash application time!

 1. Decide when you're going to add your lashes. Lashes that are put on before any makeup application will last longer, but most people prefer to put them on after eyeshadow is applied so that no fall out gets on the lashes- it's your choice. For me, fall out is easy enough to wipe off the lashes, but I have experienced the corners of the strip coming off because it wasn't directly adhered to the skin.
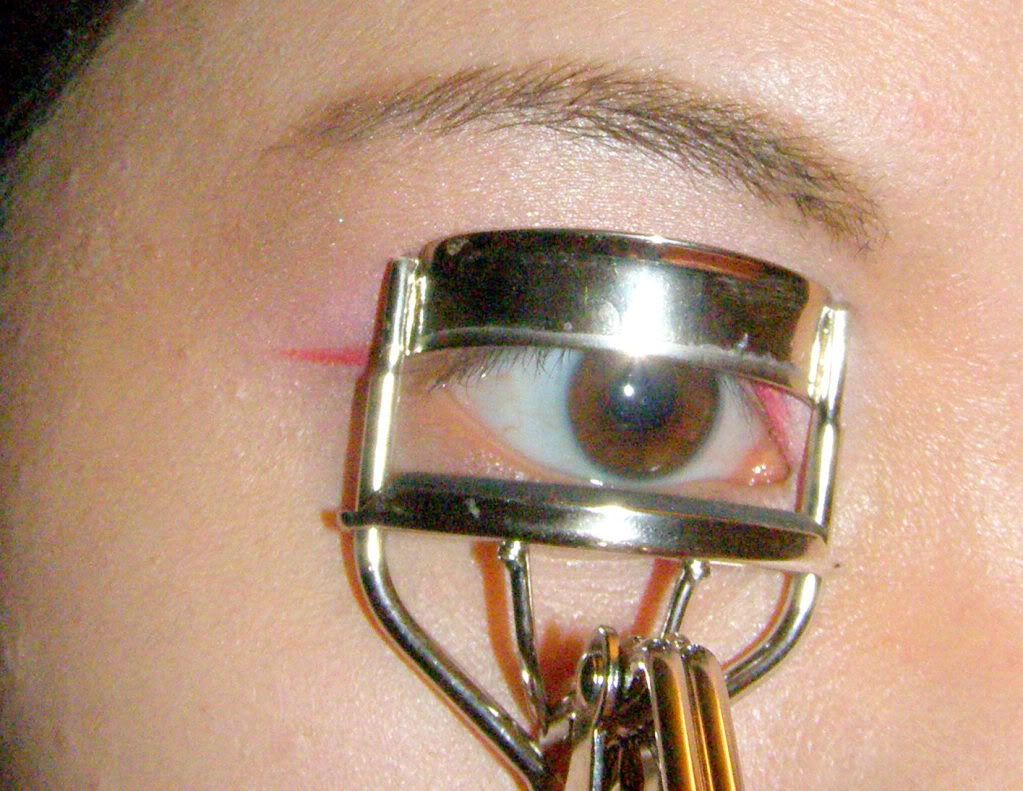
 2. Start by curling your own lashes. This will help the falsies blend in better.
 3. Carefully take the false lashes out of the package. When applying them, you'll do one eye at a time. Take a strip of lashes (remember to note which eye it'll go on) and fit it over that eye so that you have a good idea of where it's going to fit. Snip off a few hairs on either side if it's too long for your eye shape.
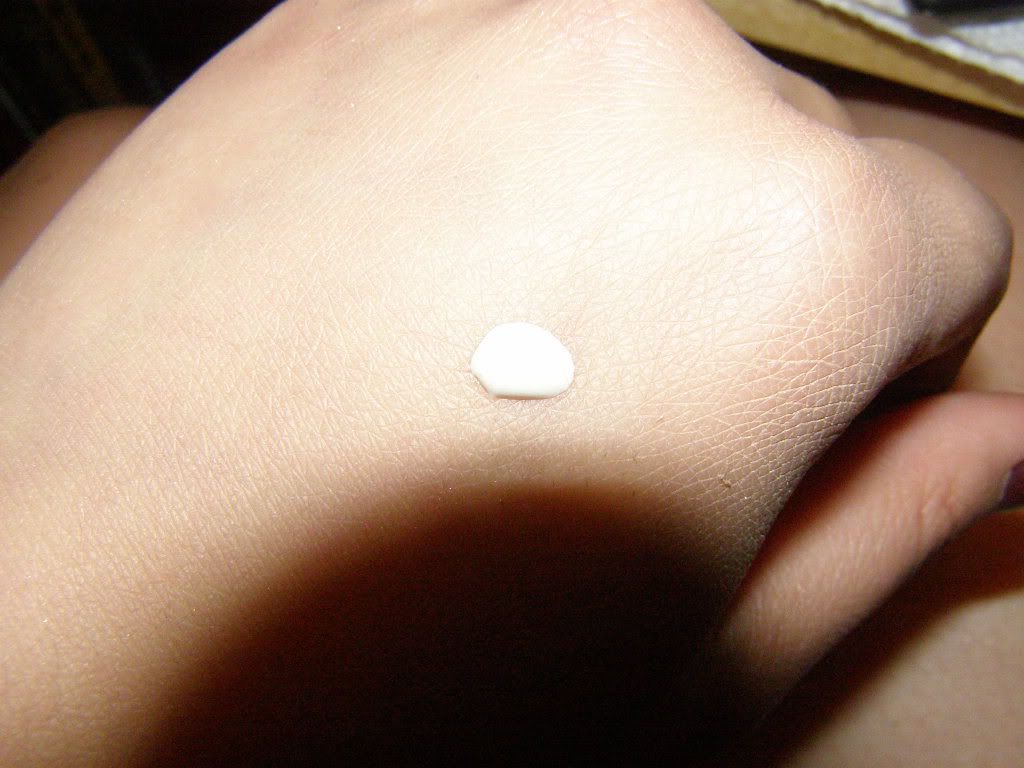
5. Wait about 20 seconds for the glue to become tacky. During this time, you want flex the entire band into a crescent shape (like your eye!).
6. While looking downwards into a mirror, set the lash strip over your lashes, and match the band with your lash line- letting the band sit right on top of where your natural lashes meets your lid.


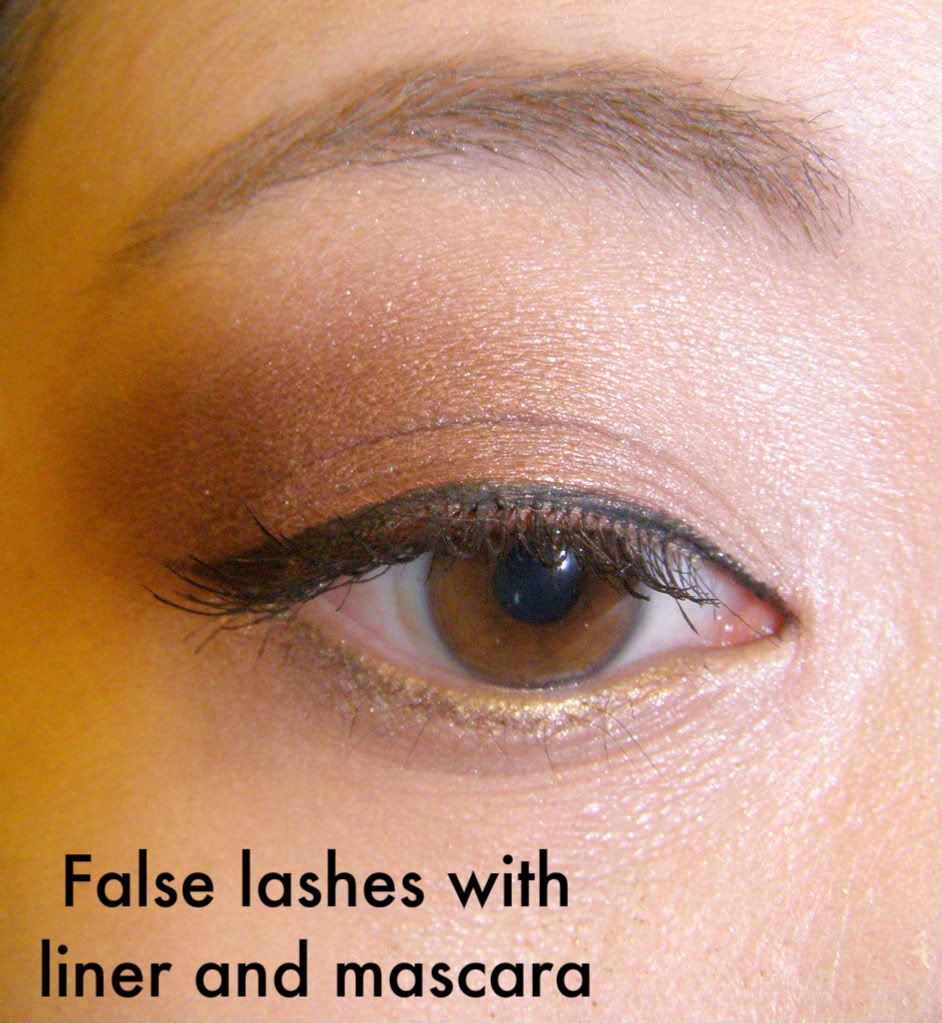
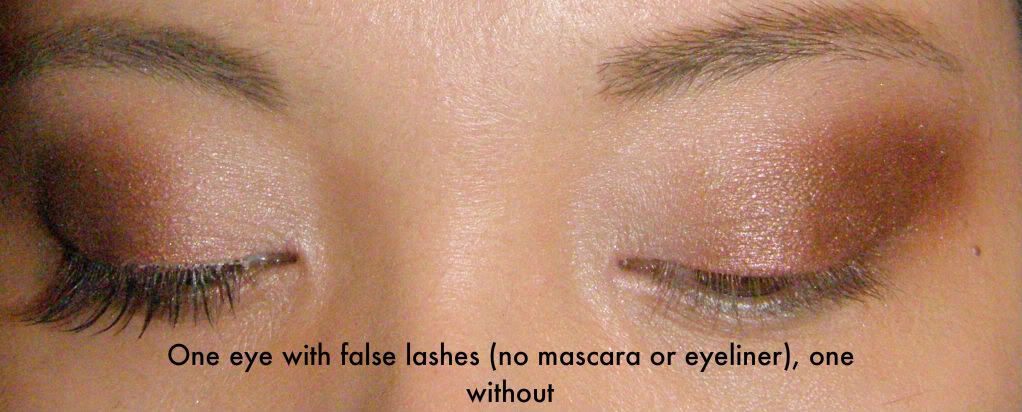
9. Depending on the lashes- you may want to add a coat of mascara (Shu recommends that you don't for theirs). This will help the your natural lashes blend together with the false one. However, don't curl them. Now only is this damaging to your lashes, it can make the false ones kink into weird directions.
10. Repeat by doing the other eye.
Ta da! Much like this post, you're finally done!
There'll be another post about removing false lashes, as well as applying individual lashes.
So, how have your experiences with false lashes been?
No comments:
Post a Comment